
Adventure
Life is an amazing adventure…. each day we encounter the unexpected, seek new paths and marvel in tiny joys. We make our days magical by how we approach the world around us. This is the wonder of adventures – it is within each of us to find them every day.
Our family has many “capital A” Adventurers… traversing to hidden islands, savannahs, grand temples and Antarctic glaciers.
For me, I have always loved finding everyday adventures. Exploring a new city, walking a different trail or pulling off the side of the road when an arrow points to a mysterious treasure, for us, often a waterfall.
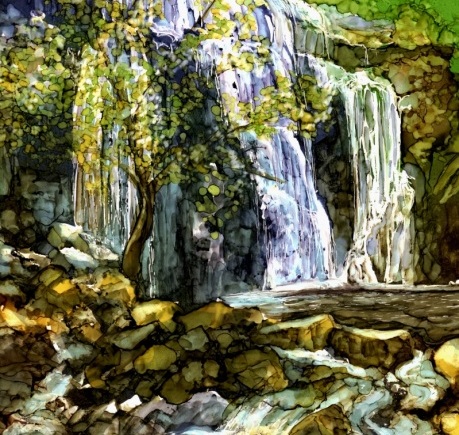
Our paintings this week explore the movement and majesty of waterfalls. “MacKenzie Falls” takes us on a capital “A” Adventure to Australia. The various ink textures invites us into the scene. We can hear the rush of the water over the rocks. The leaves on the trees dance and whole image is infused with light.
I hope you explore adventures large and small this week in your art… I can’t wait to see where the adventure takes you.
Creative Sparks
- Explore perspectives: the view from the top of the waterfall or mountain looking down
- Hot air balloon over a scenic vista
Triple Play!
For our adventurous waterfalls, we have three demonstrations this week: A new piece, Columbian Waterfall at right, plus two oldies from the Landscape course – Mackenzie Falls and a very fun Finger-painted Waterfall – happy painting!
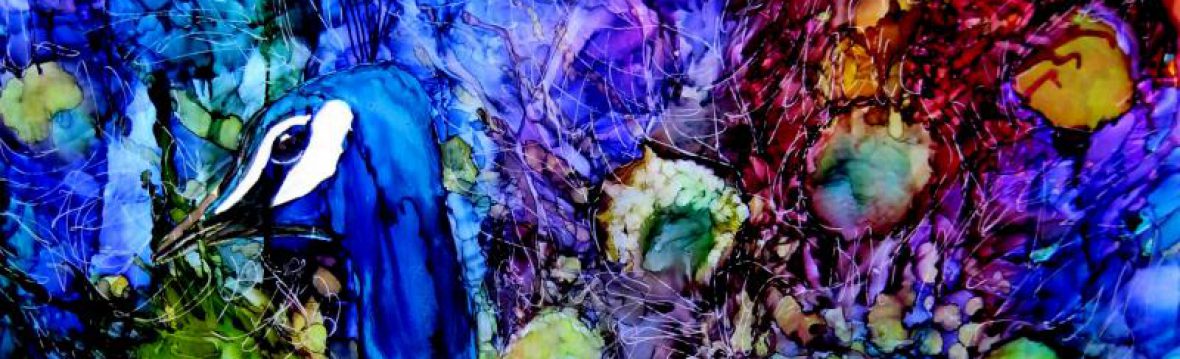
Columbian Waterfall

About this painting: As I was looking at waterfall images, this reference photo stood out because of the bright red flowers in the foreground – a lovely contrast to the sea of greens in the forest. The whites in the water are created by both masking and the use of Snow Cap ink. Planning ahead to use the Snow Cap significantly reduced my stress regarding not losing the lights in the water.
Challenge Level: ✮✮✰
Why: Getting the flow of water is waterfalls is difficult. I’m not entirely satisfied with how it came out…hopefully, your water will run more freely!
Predominant technique: Masking with direct painting and lifting. For the white parts of the water, a combination of masking and Snow Cap was used.
Paper size: 9″ x 10″, cropped image 7″ x 8″
Inks: Eggplant, Meadow, Teakwood, Botanical, Sandal, Citrus, Poppyfield, Teakwood, Cool Peri, Bottle, Dandelion, Snowcap, Pistachio
Reference image: https://pixabay.com/en/colombi…
Project Steps:
- Begin with a pencil sketch on Yupo
- Partially mask the areas to remain white and those where clear color is desirable. Let dry
- Create an inky background by dropping forest colors on the paper, using the cotton ball as necessary to texture and ensure that the paper is covered. Let dry
- Remove the masking fluid
- Dispense some Eggplant ink into the welled palette so that it may thicken
- Lift out the rocks surrounding the waterfall with the brush and alcohol
- Add dark values with the brush and Eggplant ink
- Lift out a tree shape with the brush and alcohol
- Add a first layer of green ink for the ti leaves
- Add a first layer of red ink for the flowers
- Lift out more of the waterfall area with the pointed cotton swab and alcohol
- Continue lifting to create lights in the foliage and the waterfall
- Add additional dark values around the waterfall
- Tone parts of the waterfall with Cool Peri
- Add darker greens to the leaves
- Add yellow green to the foliage
- Sketch in the waterfall with a pale marker
- Add highlights in the waterfall with Snow Cap
- Texture the foreground with the makeup sponge and darker inks so that the green leaves will show up better
- Add more dark values to the ti leaves
- Use the cotton swab and alcohol to lift lights in the leaves and the blossoms
- Continue fine tuning the leaves and flowers
- Use the cotton swab and alcohol to add more lights throughout the painting
- Dab in brighter colors in the foliage with the makeup sponge and texture with the brush and alcohol
- Add more lights to the waterfall with Snow Cap
- Define edges with the Sepia pen and soften as necessary with ink and the brush
- Add additional color as desired
- Make final adjustments as needed – I added more color, did some splattering, and highlighted with the white and black pens
Video Notes:
About 9:40, I overly textured the background foliage. If you are following along for your project, I’d skip this part.
Mackenzie Falls
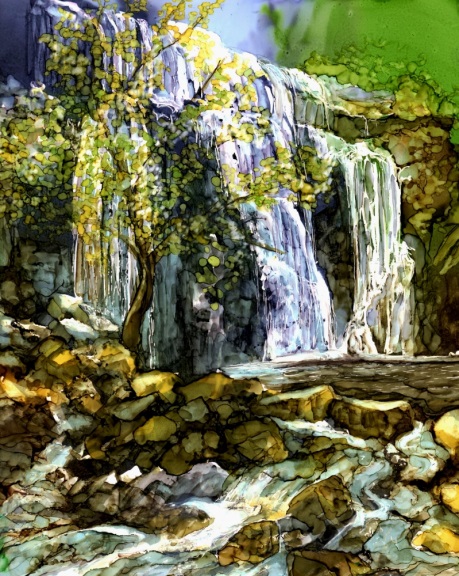
About this painting: This painting was originally presented in my Landscape course – an example of planning and strategy for a more complex piece. The video includes a (for me, lengthy) segment on how I approached this piece.
Challenge Level: ✮✮✮
Why: There are lots of challenges in this piece – a larger size (between 11″ x 14″ and 8″ x 10″), double masking, preserving white areas in the water, skipping the fern, adding in the tree at the end, and flowing water.
Paper size: 10″ x 14″, cropped Image – 9″ x 10 1/2″
Inks: Cool Peri, Peach Bellini, Espresso, Ginger, Eggplant, Meadow, Butterscotch
Reference image: Mackenzie Falls was inspired by the reference photo from Mackenzie Falls III by Simon shared by Robyn Lovelock at: https://pmp-art.com/robyn-ro-l… Please be sure to credit the photo with the link if you choose to paint this and show it on the internet. Thanks!
Project Steps:
Since I included an outline of the steps in the video, I’ve opted to include that list here:
- Plan
- Sketch the falls and note the areas to be masked
- Mask the whites
- Add pale tones and mask
- When dry, ink the painting
- Remove the masking fluid
- Soften, lift, paint the falls and foliage
- Create the rocks
- Water flow
- Tree
- Adjustments
- Final Penwork
Video Notes
This is an older video in 4 parts – 3 short videos for the painting and an introduction video which offers a pretty detailed explanation of the painting process. I decided to present the videos as they originally appeared in the landscape course with captioning instead of voice narration.
Finger-painted Waterfall

About this painting: Are you ready for some fun? Something different? I hope you’ll enjoy loosening up with this finger-painting!
Challenge Level: ✮✰✰
Why: It’s fun and you can’t go wrong…what’s not to like?
Predominant technique: Finger-painting
Paper size: Not sure, probably between 11″ x 14″ and 8″ x 10″
Inks: Snow Cap, Willow, Citrus, Meadow, Espresso, Eggplant, Caramel, Meadow
Reference image: See downloadable below
Project Steps:
- Drop ink from the bottle and finger-paint (no brushes or any tools)
Video Notes
This is another older video from the old Landscape course. It features an narrative introduction and captioned video for the painting. On the plus side, it does show the entire painting process.

